Dongguan UFine Daily Chemical Co.,Ltd.
- All
- Product Name
- Product Keyword
- Product Model
- Product Summary
- Product Description
- Multi Field Search
Views: 222 Author: Tomorrow Publish Time: 10-29-2025 Origin: Site


Content Menu
● Materials and Safety Considerations
● Compliance and environmental considerations
● Variations and customization
● FAQ
>> 1. How long do DIY laundry pods last after making them?
>> 2. Can I use regular dish soap to make DIY pods?
>> 3. Are DIY laundry pods safe for HE washing machines?
>> 4. What if pods are too weak and crumble?
>> 5. Can I customize the fragrance of the pods?
Making your own laundry pods at home can be a practical and cost-effective way to clean clothes while avoiding certain store-bought additives. This guide provides a straightforward method to create simple, effective laundry pods using common household ingredients. The steps are clear, and the process is designed to minimize mess and maximize safety.

Laundry pods are compact, multi-functional items that combine detergent, stain-fighter, and softening agents in a single package. DIY pods can reduce plastic waste and allow customization for different fabric types and cleaning needs. This article presents a practical approach to making DIY laundry pods using accessible materials, with emphasis on safety, accurate measurements, and proper storage. By making pods at home, you gain control over the ingredients, enabling you to avoid certain additives or fragrances that some people find irritating. The following sections outline a thorough, repeatable process that balances practicality with caution.
- Laundry detergent: Choose a detergent you trust, preferring a formulation suitable for your washing machine type (standard or high-efficiency). Powder or liquid concentrates can be used, but adjust water content accordingly.
- Borax or a suitable substitute: Borax can act as a booster for cleaning power and water softening, but use only if you have verified safety for your household and consider any sensitivities.
- Washing soda or baking soda: These act as builders to enhance cleaning efficiency and help remove odors.
- Cornstarch or powdered sugar: Used to aid binding and improve pod integrity.
- Water: Colorless, clean water is best. Use sparingly to achieve a moldable consistency without creating a slurry.
- Silicone mold or ice cube tray: A reliable mold ensures uniform pod size and reduces sticking.
- Protective gloves and eye protection: Essential when handling cleaning ingredients.
- Food-grade essential oils (optional): For fragrance, use only small amounts and ensure they are skin-safe.
- Airtight storage container: Keeps pods dry and prevents accidental dissolution.
Safety notes:
- Wear gloves and eye protection during preparation.
- Keep pods away from children and pets; store in a secure container.
- Do not substitute hazardous cleaners in place of laundry detergent; some products may not rinse cleanly.
- If using essential oils, confirm compatibility with fabrics and skin sensitivity; avoid concentrated applications.
1. Prepare the workspace:
- Clear a clean, well-ventilated area. Lay down protective coverings if needed. Have all ingredients measured and labeled to minimize confusion during mixing.
2. Mix dry ingredients:
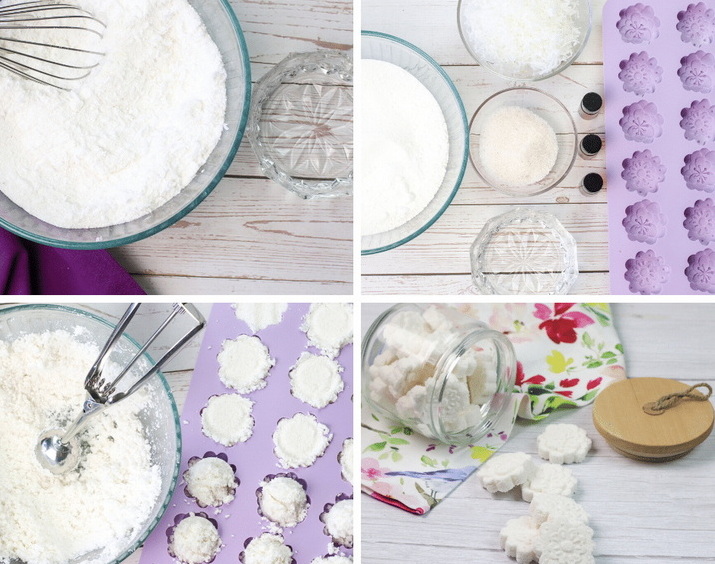
- In a large mixing bowl, combine detergent, borax (if using), washing soda, and cornstarch. The goal is a uniform dry blend that will bind when moisture is added. Stir thoroughly to ensure even distribution of all components.
3. Optional fragrance and color:
- If you desire fragrance, add a few drops of skin-safe essential oil and a tiny amount of colorant if you want the pods to be visually distinct. Stir again to distribute evenly. Be mindful that colorants can stain molds; consider using a small amount and testing first.
4. Introduce moisture gradually:
- Add water slowly, a few drops at a time, while mixing. The mixture should reach a damp, cohesive texture similar to damp sand, not a sticky slurry. The exact amount of water will depend on the detergent formulation and ambient humidity. If the mixture becomes too wet, sprinkle in a bit more cornstarch and fold it in.
5. Form the pods:
- Pack the mold with the mixture, pressing firmly to ensure compact pods. For rectangular pods, you can press the mixture into a silicone tray and then cut into individual pieces after partial setting. Ensure each pod has an even surface to avoid crumbling later.
6. Drying and curing:
- Place the filled molds in a cool, dry area away from direct sunlight. Allow the pods to dry and harden for at least 24 hours. For very humid environments, you may need up to 48 hours to achieve full hardness.
7. Unmold and finalize:
- Gently remove the pods from the molds. If any pods feel soft, let them cure longer in a dry space. Inspect each pod for cracks or crumbling; set aside any that are not fully firm.
8. Storage and labeling:
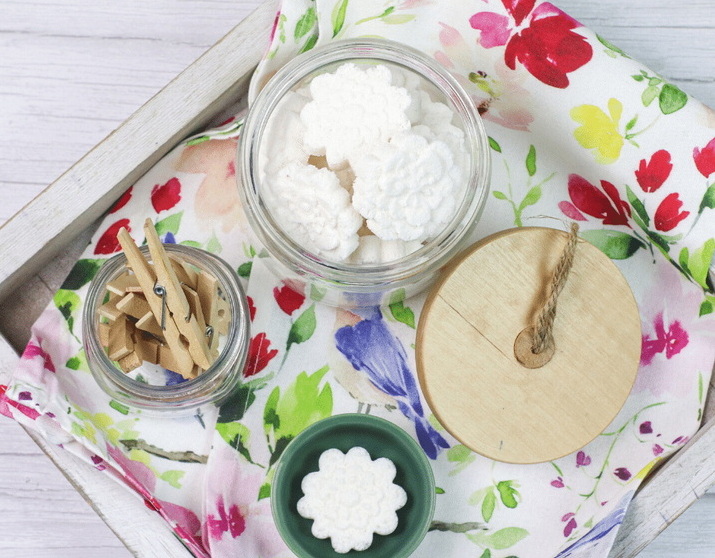
- Store the hardened pods in an airtight container, away from moisture and heat sources. Label containers with production date and safety notes. Keep out of reach of children and pets, and consider using a childproof container.
9. Test washing performance:
- Before regular use, test one pod on a small, inconspicuous fabric swatch to confirm that it dissolves cleanly and does not leave residue. If using colored pods, ensure the dye does not transfer to fabrics.
10. Scale-up considerations:
- If you plan to produce larger batches, consider adjusting mold sizes for consistency and using a vibrating table or gentle tapping during molding to reduce air pockets. Ensure consistent mixing to prevent clumps.

- Store pods in a dry, airtight container in a cool area, away from sunlight. Proper storage preserves potency and prevents premature dissolution.
- For HE washers, use one pod per load, adjusting for heavy soil or large loads as needed per detergent guidelines.
- If pods become soft or crusty on the outside, check humidity and drying time. Longer drying times usually improve durability.
- Do not place pods directly into the drum when they are not fully hardened, as soft pods may leak or melt.
- Pods crumble easily:
- Increase cornstarch content slightly.
- Ensure thorough compaction in molds and check moisture distribution before molding.
- Pods dissolve too quickly in water:
- Reduce moisture and ensure they are fully dried before storage.
- Avoid using excessive moisture during mixing.
- Residue on clothes:
- Ensure pods are fully dissolved before starting the wash cycle.
- Consider reducing detergent concentration or switching to a milder formulation.
- DIY pods can cut down on plastic packaging waste compared to commercial pods.
- Choose biodegradable and non-toxic ingredients when possible.
- Dispose of unused components responsibly, following local waste guidelines.
- Be mindful of environmental impact when adding fragrances and dyes; use natural or minimal additives when feasible.
- Fragrance-free: Skip essential oils entirely.
- Hypoallergenic version: Use fragrance-free detergent and omit essential oils.
- Hypoallergenic δ: If you have highly sensitive skin, consult a dermatologist and consider fragrance-free options.
- Colorful pods: Add a small amount of food-grade colorant to the dry mix, but test for staining before large-scale production.
- Delicate fabrics: For delicate items, you may consider reducing detergent concentration or using a milder base formula.
Crafting your own laundry pods combines practicality with customization, allowing you to tailor cleaning power and fragrance to your preferences while reducing packaging waste. By following careful measurement, thorough mixing, and adequate drying, you can produce durable pods that perform well in most household washing scenarios. Always prioritize safety, especially when handling cleaning agents, and conduct small-scale tests before expanding production.

They typically last several weeks to a few months when stored in a dry, airtight container away from moisture.
Do not use dish soap. It is not formulated for laundry use and may not rinse out properly, potentially causing residues on fabrics.
Yes, when used as directed, one pod per load, but ensure they are fully hardened before use to prevent premature dissolution.
Increase cornstarch content slightly and allow extra drying time to improve binding and hardness.
Yes, you can add skin-safe essential oils in small amounts, but test on a small batch first to ensure there is no staining or residue.